|
MICO
1.1.0
Modular Interchangeable Computer prOgramming
|
|
MICO
1.1.0
Modular Interchangeable Computer prOgramming
|
The easiest way to install MICO is to use the automatic package installer. It can be download directly from github releases.
Download the zip file and follow the instructions.
Building it from sources takes more time, but most of the process has been automated using cmake and VCPKG.
We recommend you to install Visual Studio Community version. It can be downloaded from the official Microsoft webpage (https://visualstudio.microsoft.com/es/vs/community/). There is not current support for MinGw or CygWin, but if you want to use them share the process with us and we will integrate that option, we appreciate any contribution.
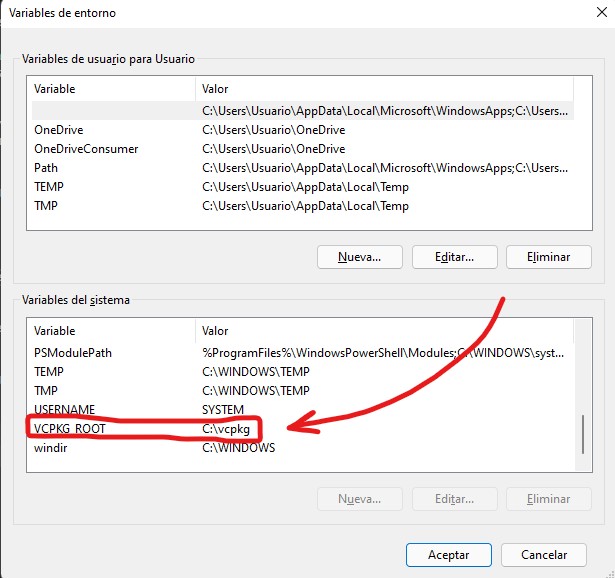
VCPKG is a package/library manager that makes programmers' life easier! It works in Window, Linux and Mac and contains a bunch of ports for almost all the common libraries used by developers daily. In order to use it, you just need to clone it and create a new variable in the environment pointing to its root folder.
Do not forget to create the environment variable:

If you are in Windows and plan to use Visual Studio, you just need to clone the repository and open the folder in it. VS will do the rest (assuming you are running VS2022)
At this point, go to the kitchen an make a te or pop-corn. The process takes an average of two hours to download and compile all the dependencies in Windows. Once the process has finished we are ready to install everything